There are many methods for cropping your image in Photoshop; in this Photoshop Tutorial we focus on the easiest method, but we crop with the use of a grid to help create a more dynamic image. If you want to follow along, find this image here.
-
Select the Crop tool. When the Crop tool is selected, you see a selection indicator around the image and four corner markers. You can just click and drag on these corner markers to crop the image, but in this lesson, you will learn to create your own new custom cropped area.
-
The purpose of cropping this image is to allow it to proportionally fit into a 4 × 6 area, and also to create a closer crop around the boys’ faces
-
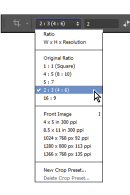
Note that when the Crop tool is selected, you have additional options available in the options bar across the top of the window. Click once on the Select an aspect ratio drop-down menu and select 2:3 (4:6). A crop area is created, but you will adjust it.

-
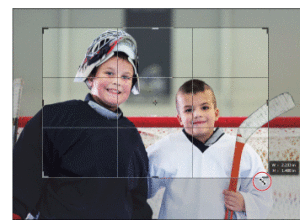
Note that when you click and drag on the corner of the crop area, the aspect ratio of the crop remains intact. Also note that a default grid that represents the “rule of thirds” appears. You will use this grid to create a more dynamic crop.
-
Now click and drag from the lower-right corner. This time, as you position, pay attention to the guidelines. Try to position the crop area so that the center of the taller boy’s face is directly in the middle of the intersection of the guideline in the upper-left area.

Click and drag to reposition the lower-right corner of the crop area. - Uncheck the Delete Cropped Pixels check box that is in the middle of the Crop tool options bar. By unchecking this box, you will not delete any image information, and will be able to reposition your crop at a later point.
-
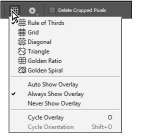
Keep in mind that even though using the rule of thirds is only a guideline, it can provide you with some direction when cropping your image. If you do not like seeing the gridlines, or would like to use another grid, you can turn it off, or choose another by selecting the Set the overlay options button in the Crop tool options.

You can turn off the grid lines, or select another from the Crop tool options bar. - To see how the existing pixels are still stored, switch to your Move tool. You will move your image area, and then immediately undo that move so as to not change your cropped image.
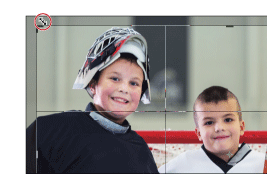
- Using the Move tool, click the image area and drag to reposition your image area. Notice that, since you unchecked Deleted Cropped Pixels, the pixels still exist. Use this feature when you are not sure if you will need to reposition an image inside of the cropped area.
- You can press Control+Z (Windows) or Command+Z (Mac OS) to undo your repositioning. If you made several moves, you can choose Windows > History, and go back several steps by clicking Crop in the History panel.


