 If you are looking for a quick and easy way to build a custom border try this technique that uses any shape you want, along with the Rotate tool.
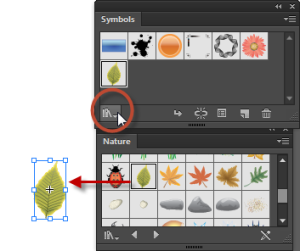
- Take the shape that you want to use as a circular border, in the example The Symbols Library Menu was clicked, and the Nature symbol library was selected. The leaf was then dragged out of the Nature panel onto the artboard.
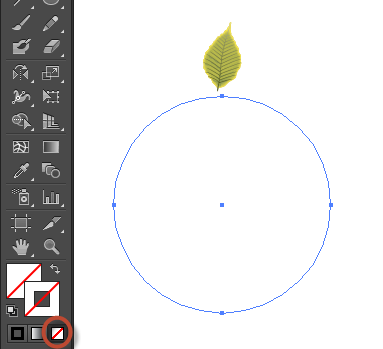
You can use existing symbols for ready-to-use objects - Next, a circle is created that will determine the dimensions of the border.
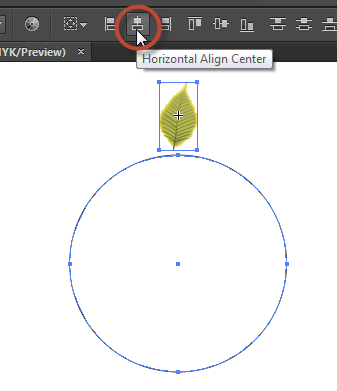
- Using the Selection tool, select the shape (leaf in this example), and then Shift click to add the circle to the selection.
- Click on Horizontal Align Center to centered the shapes on top of each other.

Select the circle and your shape and choose Horizontal Align Center - Deselect by clicking off the selected objects, and then select the circle; apply No fill, and No Stroke to the circle.

Make sure that you cannot see the circle by choosing No fill for the stroke and fill. - Press Control +Y (Windows) or Command+ Y (Mac OS) to see your artwork in the outline view.
- Select the shape that you want to create the border from, not the circle.
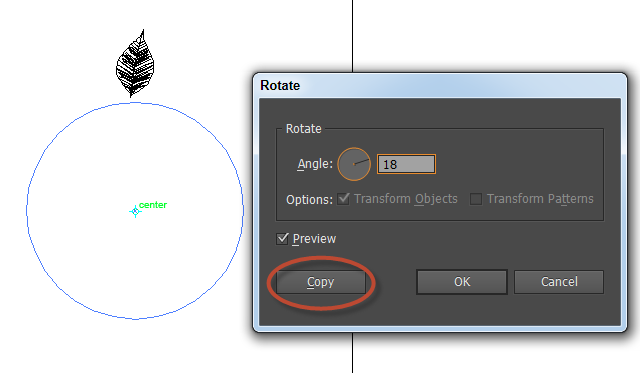
- Select the Rotate tool, and then Option+Click on the center point of the circle. The Rotate dialog box appears.
- You now need to decide how many shapes you want to repeat around the circle. The value you pick should be able to be divided into 360 degrees. In other words, if you want to have twenty leaves, you would divide 360 by 20, which equals 18. By dividing your number of shapes into 360 degrees, you can be sure that your item is spaced evenly when you rotate it around the circle.
- In this example twenty leaves are used, so 18 is typed into the Angle text field.
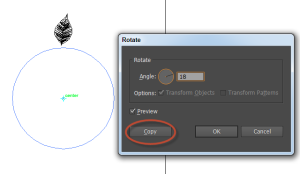
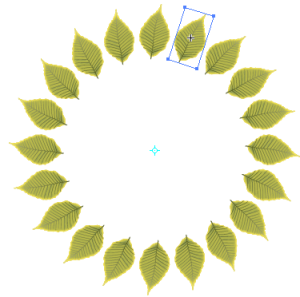
- Press Copy to see the first leaf appear. Now Press Control/Command + D to repeat that transform until the shapes come full circle back to the beginning.
- Press Control/Command Y to see your results.
When completed, you have a perfectly spaced border.


2 thoughts on “Create a perfect circular border using shapes in Illustrator”
Comments are closed.
Thank you VERY MUCH! You are a STAR!
Blessings.
Thank you for this tutorial. 🙂